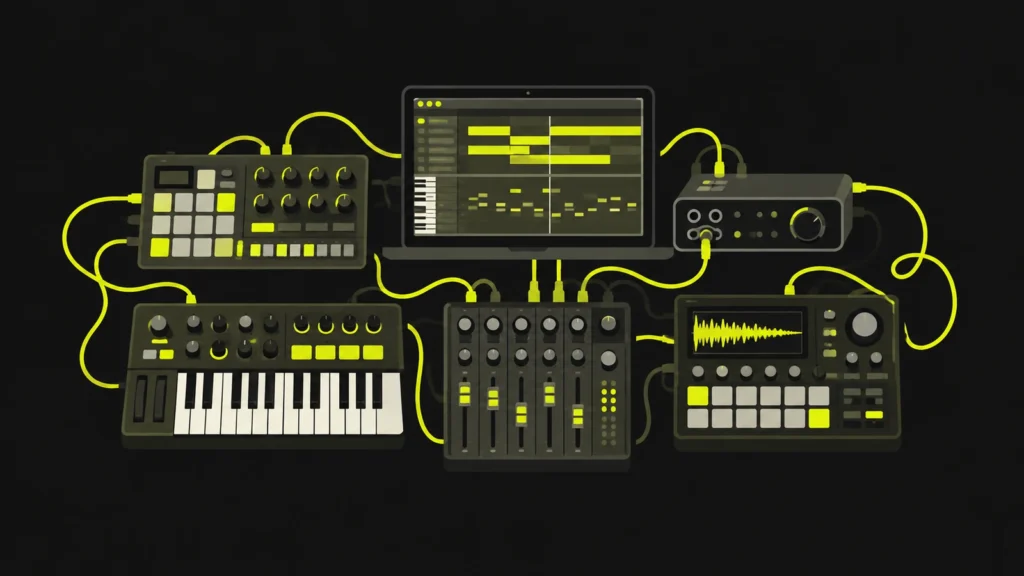
You can start electronic music production with a computer, a digital audio workstation (DAW), and headphones you already own. You do not need an expensive synthesizer, an acoustically treated studio or a collection of paid plugins to make your first track. The most useful first investment is time spent learning a simple workflow: make a beat, add a bassline, arrange the idea, balance the mix and export it.
This beginner’s guide explains what to buy (and what to skip), how to choose music-making software in 2026, and how to finish a first electronic track. Whether you’re drawn to techno, house, ambient or drum and bass, the core process is similar.
Quick start: What do you need to make electronic music?
| Essential now | Useful later | Not required to begin |
|---|---|---|
| A computer capable of running your chosen DAW | A MIDI keyboard or pad controller | Analog synthesizers and drum machines |
| A DAW, including a free option or trial | An audio interface for microphones, instruments or studio monitors | Expensive third-party plugins |
| Headphones or speakers you can listen on comfortably | Studio monitors and a suitable listening space | A professional studio, degree or record label |
| A few legally usable drum samples and built-in instruments | Additional samples and instruments for specific sounds | Paid sample subscriptions |
The short version: Install one DAW, pick a few sounds, and aim to finish a 60–120-second piece before you spend money on extra gear.
1. Choose a DAW you can learn and keep using
A digital audio workstation (DAW) is the software where you sequence drums, record or program notes, edit sounds, arrange sections, add effects, mix and export music. Most modern DAWs can make professional-quality electronic tracks. The main differences for beginners are workflow, supported computers, included instruments and license restrictions.
If the term is new, start with our guide to what a DAW is and how it works. You do not need to master every feature before making music.
Beginner-friendly DAWs worth trying in 2026
| DAW | Why consider it | What to know before committing |
|---|---|---|
| Ableton Live | Flexible loop-based Session View and timeline-based Arrangement View; popular for electronic composition and live performance. | The full Live Suite trial lasts 30 days. You can save and export during the trial; those functions are restricted after it ends unless you buy a license. |
| FL Studio | Fast pattern sequencing, piano roll and a substantial collection of instruments and effects. | The standard trial has no time limit and can export audio, but you cannot reopen saved projects until you purchase an edition. |
| REAPER | Lightweight, configurable recording and editing workflow; useful if you like to shape your own setup. | Its fully functional evaluation is 60 days. It is not permanently free; licensing applies after evaluation. |
| GarageBand for Mac | Free Mac app with built-in instruments, loops and a straightforward interface. | Mac only; advanced routing and production tools are more limited than in larger DAWs. |
| Bitwig Studio | Creative modulation, sound design and clip-based composition on Mac, Windows and Linux. | Offers a 30-day trial; check editions and license terms before buying. |
Trial conditions and editions can change. The links above lead to the developers’ own information, checked in October 2026.
My own early experience was with FL Studio. Spending time understanding a familiar interface mattered far more than collecting fashionable gear. That does not make it the correct choice for everyone: try one or two workflows and pick the one that makes you want to return tomorrow. If you work with other producers, ask which software they use, but remember that audio stems and MIDI files can still support collaboration across different DAWs.
A simple decision rule: Want to explore clips and live performance? Test Live or Bitwig. Enjoy programming beats in patterns? Try FL Studio. Already have a Mac and want to spend nothing? Start with GarageBand. Want a highly configurable, lightweight workstation? Evaluate REAPER.
2. Start with the computer you have
Before buying a laptop, install a DAW that supports your operating system and try a small project. Real performance depends on the DAW, CPU architecture, plugins, sample libraries, buffer size and how complex your arrangement becomes.
- Processor: A reasonably modern multicore CPU is a good starting point. Check your DAW’s current requirements rather than relying on an old Intel i5-versus-i7 rule.
- Memory: Many DAWs can run with modest RAM, but 8 GB is a practical starting point for small projects; 16 GB or more offers useful headroom for larger sample libraries and plugin-heavy arrangements. These are workflow suggestions, not universal minimum requirements.
- Storage: An SSD helps projects and sound libraries load quickly. Keep enough free space for samples, exports and backups.
- Connections: Confirm that your headphones and any future interface or controller can connect to your computer. You do not need to choose a power-supply wattage based on producing electronic music.
When a session starts crackling or dropping audio, try increasing the audio buffer, freezing or rendering instrument tracks, closing unnecessary applications, or using fewer CPU-heavy plugins before assuming you must replace your computer.
3. Headphones, studio monitors and audio interfaces: when do you need them?
Start with headphones
Use comfortable, familiar headphones at a moderate volume. Closed-back headphones help reduce sound leaking into microphones and keep outside noise down; open-back designs can be pleasant for mixing in quieter rooms. Neither type guarantees a good mix. Learn what your headphones exaggerate or hide by comparing your work with reference tracks.
Protect your hearing. Long or repeated exposure to loud sound increases risk; NIOSH explains noise-exposure risks and recommends an occupational limit of 85 dBA averaged over eight hours. That workplace measure is not a target volume for home listening: keeping levels comfortable and taking breaks is a better daily habit.
Buy an audio interface when you have a reason
An audio interface becomes useful when you want to record a microphone, guitar or hardware synthesizer, connect balanced studio monitors, or need specific low-latency monitoring and inputs. If you’re producing entirely with software instruments and your computer’s headphone output works well, an interface may not be your first purchase.
Monitors and your room come later
Nearfield studio monitors can help you hear stereo balance, dynamics and low frequencies, but their accuracy depends on speaker placement and the room. Large speakers do not automatically produce better mixes in small untreated spaces. First learn to balance kick, bass and other sounds on your existing listening system, then upgrade with a clear purpose.
4. Learn the five building blocks of an electronic track
Electronic music production becomes easier when you separate its basic parts instead of trying to learn everything at once.
- Rhythm: Kick, snare or clap, hi-hats and percussion provide the pulse and groove.
- Bass: A low-frequency pattern supports the rhythm and often establishes the track’s movement.
- Harmony and melody: Chords, pads, stabs, motifs or even a single repeated note create musical identity. Some electronic styles use very little conventional harmony.
- Arrangement: You introduce, remove and vary elements over time, creating sections rather than repeating one loop forever.
- Sound design and mixing: Instruments, filters, envelopes, EQ, effects, volume and spatial placement help each element fit.
You can begin with the drum sequencer and stock synthesizers included in your DAW. You do not need to understand advanced synthesis or music theory to make a useful first sketch; learn individual concepts as your tracks require them.
5. Make your first electronic track, step by step
Here is a practical exercise. It uses a straightforward four-on-the-floor example at 125 BPM, but the method can be adapted to almost any genre. Use the sounds in your DAW or a small set of properly licensed one-shots.
Step 1: Create a clean project
Open an empty project, set the tempo to 125 BPM, and save a new folder with a clear name such as First Track 01. Create tracks named Kick, Clap, Hats, Percussion, Bass and Atmosphere. If your DAW has a template, remove any unnecessary tracks or effects.
Step 2: Program a basic four-bar beat
Put a kick drum on each quarter-note beat. Add a clap or snare on beats two and four, then closed hats on some offbeats or eighth notes. Duplicate the bar into a four-bar loop. Adjust timing and velocity slightly if the pattern feels stiff. Keep the number of sounds small so you can hear what each one contributes.
Step 3: Add a bassline that leaves space for the kick
Load a simple built-in synthesizer or bass sample. Program one to four notes over the loop. Start by placing bass notes between or around the kicks rather than filling every gap. Pay attention to note lengths, attack and decay. If the low end becomes muddy, first shorten notes or reduce levels before reaching for complicated processing.
Step 4: Create one memorable element
Add a chord stab, a short two-note motif, a textured pad or a filtered percussion hit. Change one parameter over a few bars. A distinctive musical decision is more useful at this stage than five extra instruments playing at once. For a deeper look at shaping sounds, explore our sound design guide.
Step 5: Turn the loop into an arrangement
Duplicate your loop across roughly 64 bars, then remove elements to create movement. One possible exercise is:
| Bars | Try this | Purpose |
|---|---|---|
| 1–8 | Kick and a quiet texture | Introduce the pulse |
| 9–16 | Add hats and percussion | Build momentum |
| 17–32 | Bring in bass and main motif | Establish the core groove |
| 33–40 | Remove kick or bass briefly; change an effect | Create contrast |
| 41–56 | Return to the main groove with a variation | Deliver the strongest section |
| 57–64 | Remove parts gradually | Give the ending direction |
At 125 BPM, 64 bars of 4/4 music last just over two minutes. This is an exercise, not a rule for club arrangements. The goal is to practice finishing a beginning, middle and end.
Step 6: Balance the mix before adding more plugins
Lower every track until the mix has room to breathe. Bring the kick up, then add bass and other elements one at a time. Listen quietly and check whether each part is understandable. Use high-pass filters selectively where they solve a problem; do not automatically remove low frequencies from every sound. Add reverb, delay or compression only when you can describe what you want the effect to do.
Keep the master output from clipping. There is no need to chase a specific loudness target while learning to balance a first mix.
Step 7: Export and listen somewhere else
Export a stereo WAV for your own archive and an MP3 if you want an easy listening copy. A 24-bit WAV at the project’s sample rate is a sensible working export when supported. Listen on a different pair of headphones or speakers, make a few notes, and return for one deliberate revision. Save a versioned project before large changes.
Congratulations: a finished, imperfect track teaches you more about the complete process than dozens of unfinished loops.
6. Which plugins and samples should you use?
Start with the instruments and effects your DAW already provides. Learn one synthesizer, one sampler, EQ, a compressor, reverb and delay before installing dozens of third-party plugins. Free tools can be powerful, but more choices do not automatically improve your music.
For hands-on drum programming, our 64 One-Shot Samples pack is one possible source to explore. Read the license for any sample pack before releasing tracks commercially. A download described as “free” does not automatically grant every reuse right. For borrowed music or Creative Commons material, Creative Commons explains how remixing and sampling permissions work.
If you’re specifically making techno, the next step after this overview is our techno production guide. This article deliberately focuses on getting started rather than repeating a full genre-specific tutorial.
7. How much should you spend on your first setup?
There is no universal beginner budget. What you already own is more important than a shopping list.
| Stage | Smart approach | Wait before buying |
|---|---|---|
| Exploring | Use an existing computer, headphones, free software or an appropriate trial, and built-in sounds. | Monitors, interfaces, controllers and premium plugins. |
| Making regular tracks | Choose a DAW license that lets you reliably save, reopen and finish projects. | Expensive synths and a large sample library. |
| Recording hardware or vocals | Choose an interface based on your actual input, output and monitoring needs. | Additional I/O channels you will not use. |
| Mixing more seriously | Learn monitoring, room placement, references and acoustic basics before upgrading. | Large speakers simply because they look professional. |
Don’t mistake buying equipment for developing a skill. When I first got into production, budget mattered. A limitation can push you to understand the tools you already have rather than swapping them every week.
8. A realistic four-week plan for beginners
- Week 1: Learn the interface. Set up audio output, create and save projects, program drums, edit MIDI notes and export a short loop.
- Week 2: Build sounds. Make three drum grooves, two basslines and one simple synth motif. Learn attack, decay, filters and basic levels.
- Week 3: Arrange. Pick your best loop, develop a 1–2-minute arrangement and introduce at least two clear transitions.
- Week 4: Finish and review. Make a basic mix, export the piece, compare it on another listening system and write down three things to improve next time.
This schedule is a learning prompt, not a deadline. Consistent short sessions are often more practical than waiting for a perfect weekend. If you enjoy digging deeper, Ableton’s free first-track tutorial series demonstrates the path from beats and melodies through arrangement, mixing and export.
9. Beginner mistakes that slow progress
- Switching DAWs constantly: Every restart resets your familiarity. Pick one for a few projects before deciding it cannot do what you need.
- Installing too many plugins: Learn stock instruments and effects, then add something only to solve a specific problem.
- Buying monitors before thinking about the room: Speaker size and price cannot correct difficult acoustics by themselves.
- Trying to master before arranging: Finish the musical structure and basic levels first.
- Watching tutorials without practicing: Follow one lesson, then apply it immediately in your own project.
- Using unlicensed samples: Read the terms before distributing music, especially when sampling recordings from other artists.
- Never finishing: Give yourself a modest track length and an export date. Every finished project reveals your next learning goal.
Frequently asked questions about starting electronic music production
Can I make electronic music without any instruments?
Yes. A DAW can generate drums, bass, pads and melodies using built-in software instruments. You can program notes with a mouse or computer keyboard and add a hardware controller later.
Is it possible to start producing electronic music for free?
Yes, if you already have a suitable computer and listening device. GarageBand is free for compatible Macs; other DAWs offer trials with different restrictions. Be careful with time-limited trials or trials that prevent reopening projects.
Do I need music theory to produce techno or house?
No formal qualification is required. Rhythm, note lengths, tempo, scales and basic harmony become useful as you go, but you can start with percussion and a simple bass pattern today.
Is a MIDI keyboard necessary?
No. It can make playing notes more natural, but DAWs let you draw and edit MIDI notes without one. Buy a controller when you know which physical workflow you want.
Do I need an audio interface to use a DAW?
Not necessarily. Many beginners work with a computer’s built-in output. An interface is useful for recording external sound sources, specific monitor connections or latency requirements.
What is the best DAW for electronic music?
There is no single winner. A good choice is one that runs reliably on your computer, supports the sounds and workflow you need, and lets you save and reopen your work under a license you understand.
How long does it take to learn music production?
You can build a simple beat in your first session. Developing arrangement, sound design and mixing skills takes repeated practice, and progress varies. Aim for small finished projects rather than a fixed date when you must become “professional.”
Final thought: make music before building a studio
Starting electronic music production is much more accessible than it was when hardware studios were the default. There is still a lot to learn, but you do not need to learn it all in advance. A computer, a reliable DAW and your curiosity are enough to begin. Choose one tool, make one groove, finish one small track and build from there.
Have fun. Be creative. And finish the track.